POS Terminal (Order Flow)
Contents:
- What it is and when to use it
- How to create an order and add items
- How to work with multiple orders on one table
- How to return to the floor map or another table
- How to accept payment
- How to print a kitchen ticket
- How to preview/print a bill
- How to edit order items (before payment)
- Additional order actions (settings menu)
- Table and item statuses
- Common issues and fixes
- Related articles
What it is and when to use it
- Use it to quickly process dine-in/offline orders in the POS terminal: add items, print a “Kitchen ticket”, and take payment.
- Typical roles: cashier/waiter/admin (depends on granted permissions).
How to create an order and add items
Open the “POS Terminal” section in the left menu.
If the floor map is enabled, select the table for this order on the map. If your venue does not use a floor map, you can skip this step. If you see a reservation warning near the table or in the top bar, check reservation time/details before taking the order.

Click “New order”. The system creates a new order and opens it.
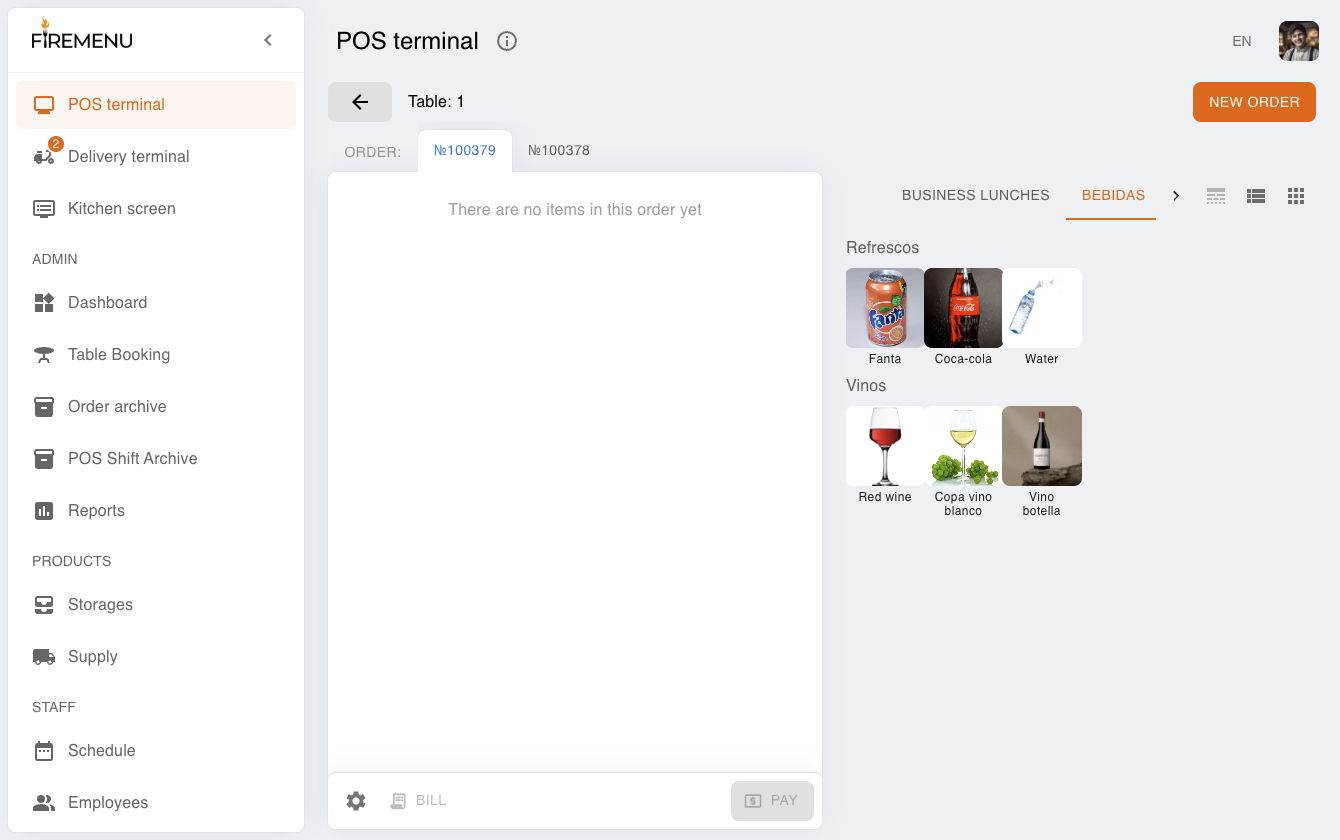
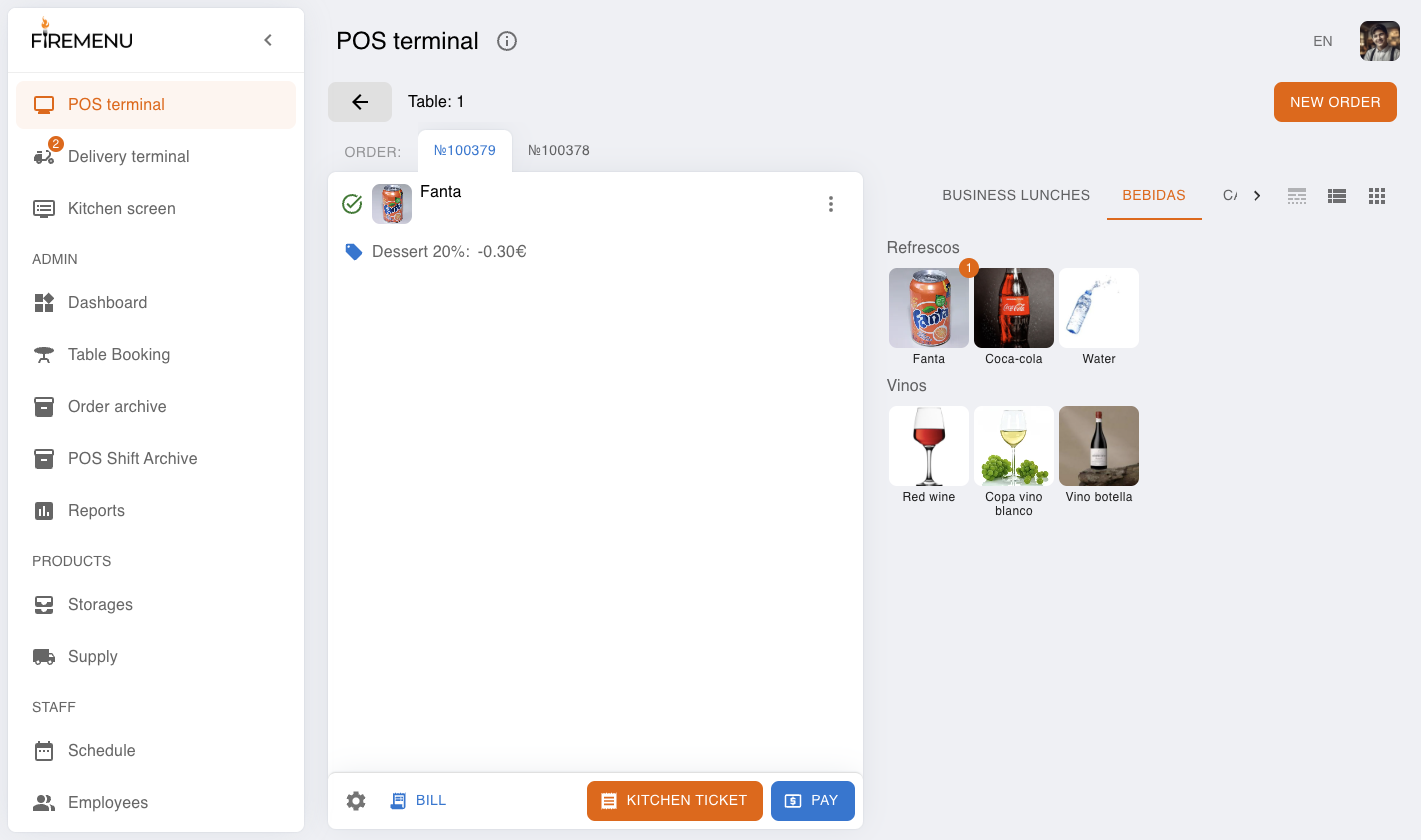
Add items from the right-side “Menu” panel (tap/click needed dishes/drinks). Added items appear in the order list, and actions “Bill”, “Kitchen ticket”, and “Pay” become available at the bottom.
How to work with multiple orders on one table
For the same table, click “New order” again. A separate check with a new number is created.
Switch between open orders using numbered tabs (for example, No.101, No.102) in the top area.
Before adding items or taking payment, confirm that the correct order tab is active.
How to return to the floor map or another table
If the floor map is enabled and a table is selected, click the top “Back” arrow button.
The system returns you to the floor map (same hall), where you can choose another table.
If the floor map is disabled, this flow has no “Back” button: work with open orders using the numbered tabs at the top.
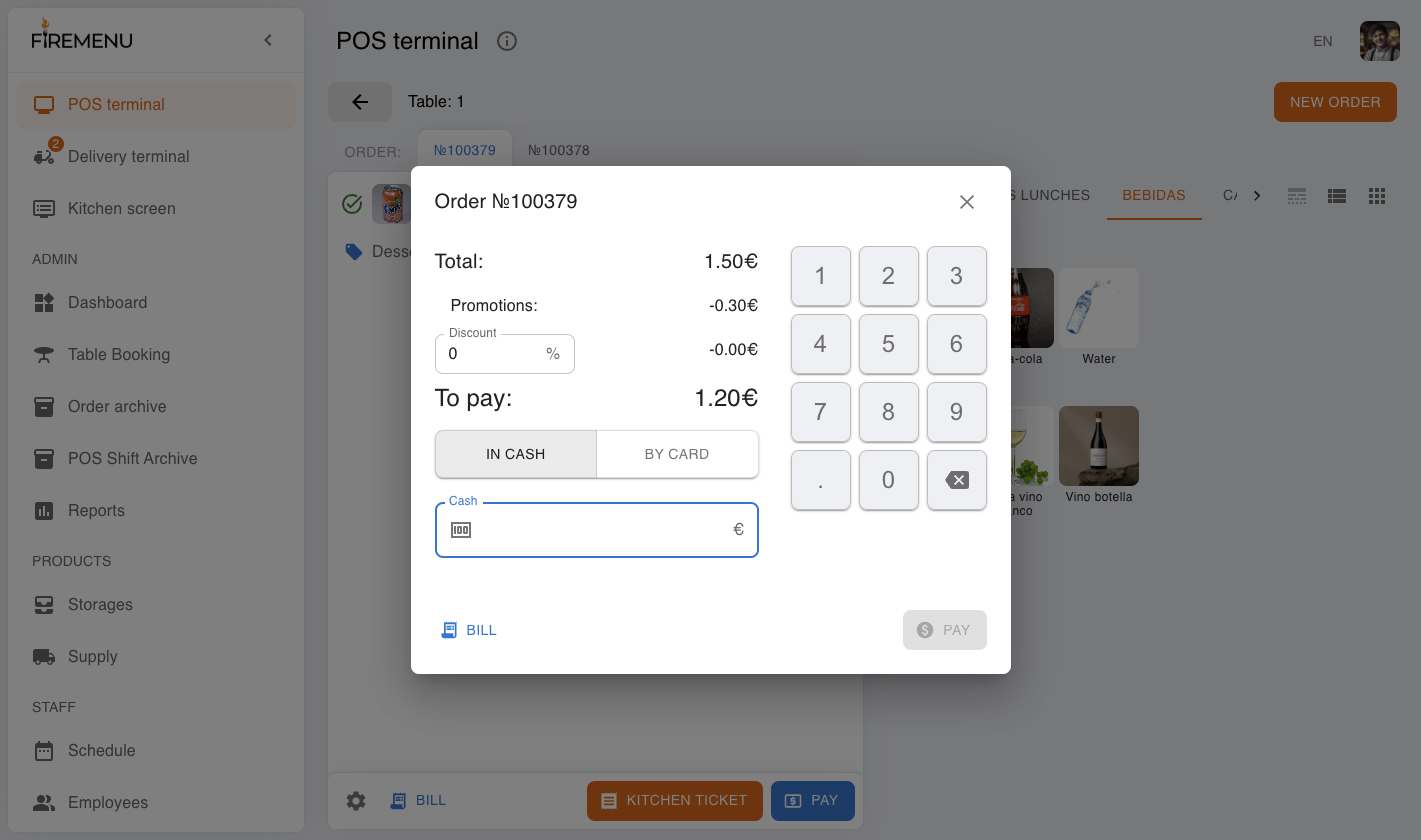
How to accept payment
In an open order, click “Pay”.
In the payment window:
Set “Discount” if needed.
Select payment type: “Cash” or “Card”.
If you selected “Cash”, enter the cash amount. If cash is less than “To pay”, you will see “Pay the rest by card”. If cash is greater, “Rest” is calculated automatically.
Click “Pay” to confirm.
How to print a kitchen ticket
Add items that must be sent to kitchen/bar.
Click “Kitchen ticket”.
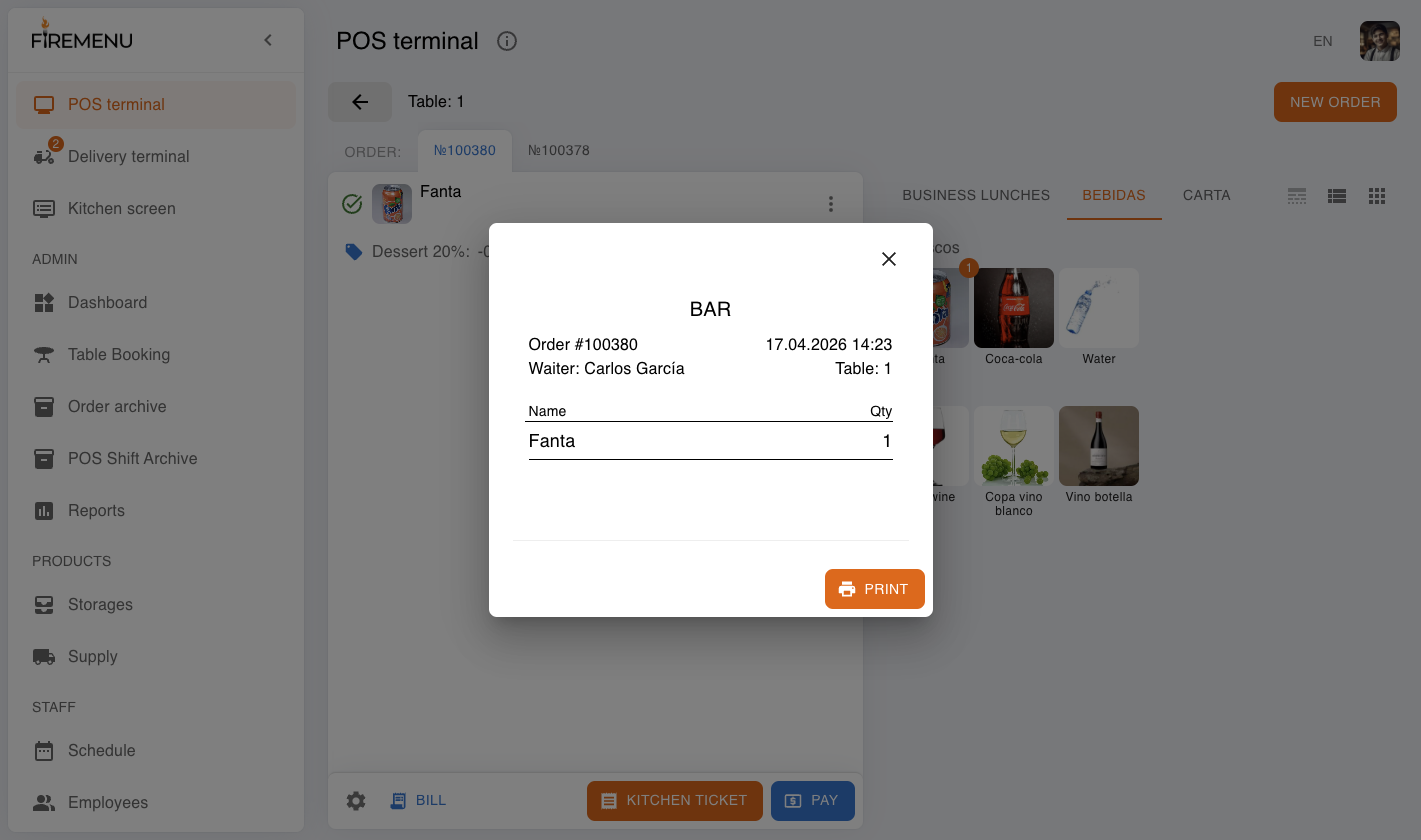
In the preview window, click “Print”.
How to preview/print a bill
In an open order, click “Bill”.
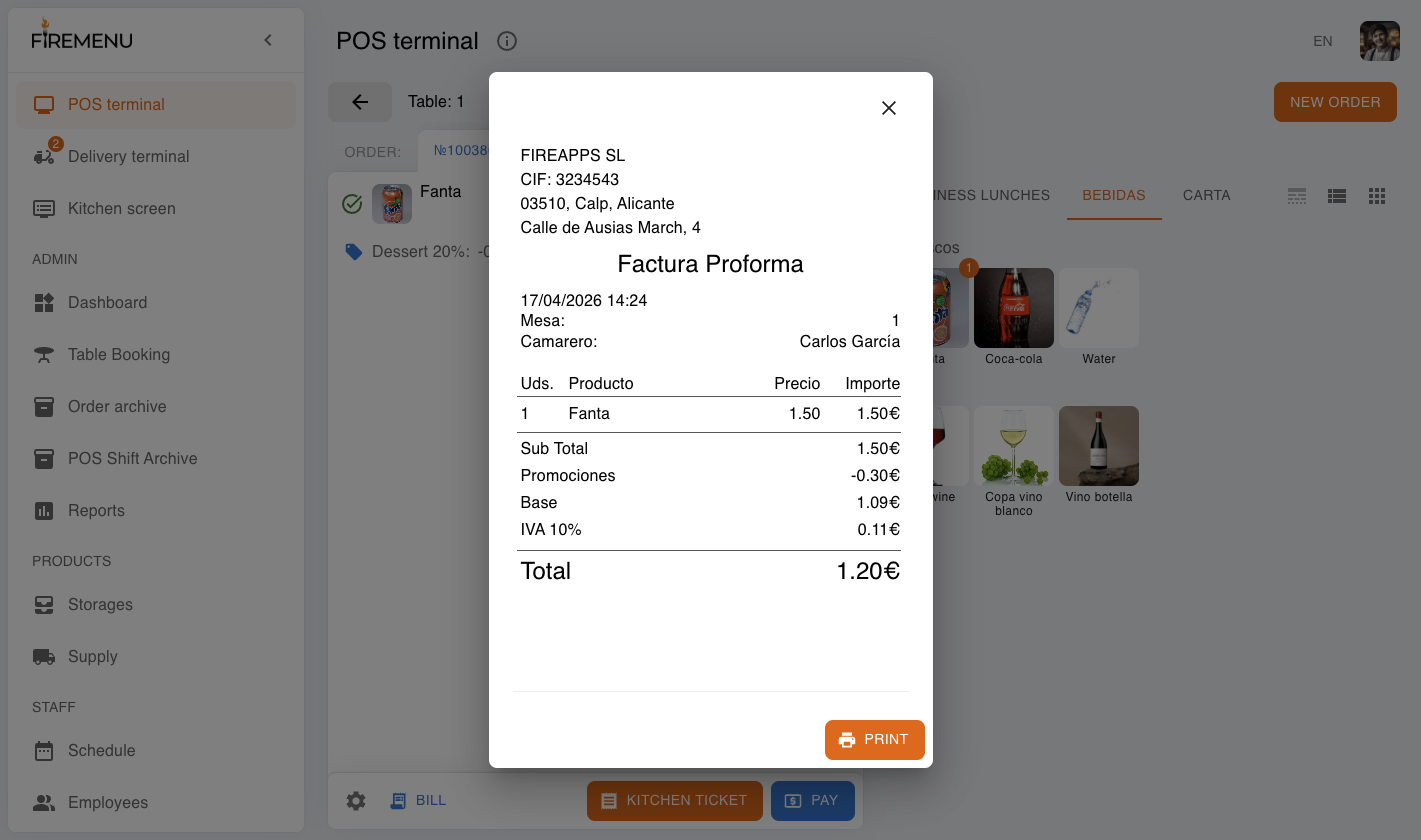
If needed, click “Print” to hand the bill to a guest before payment.
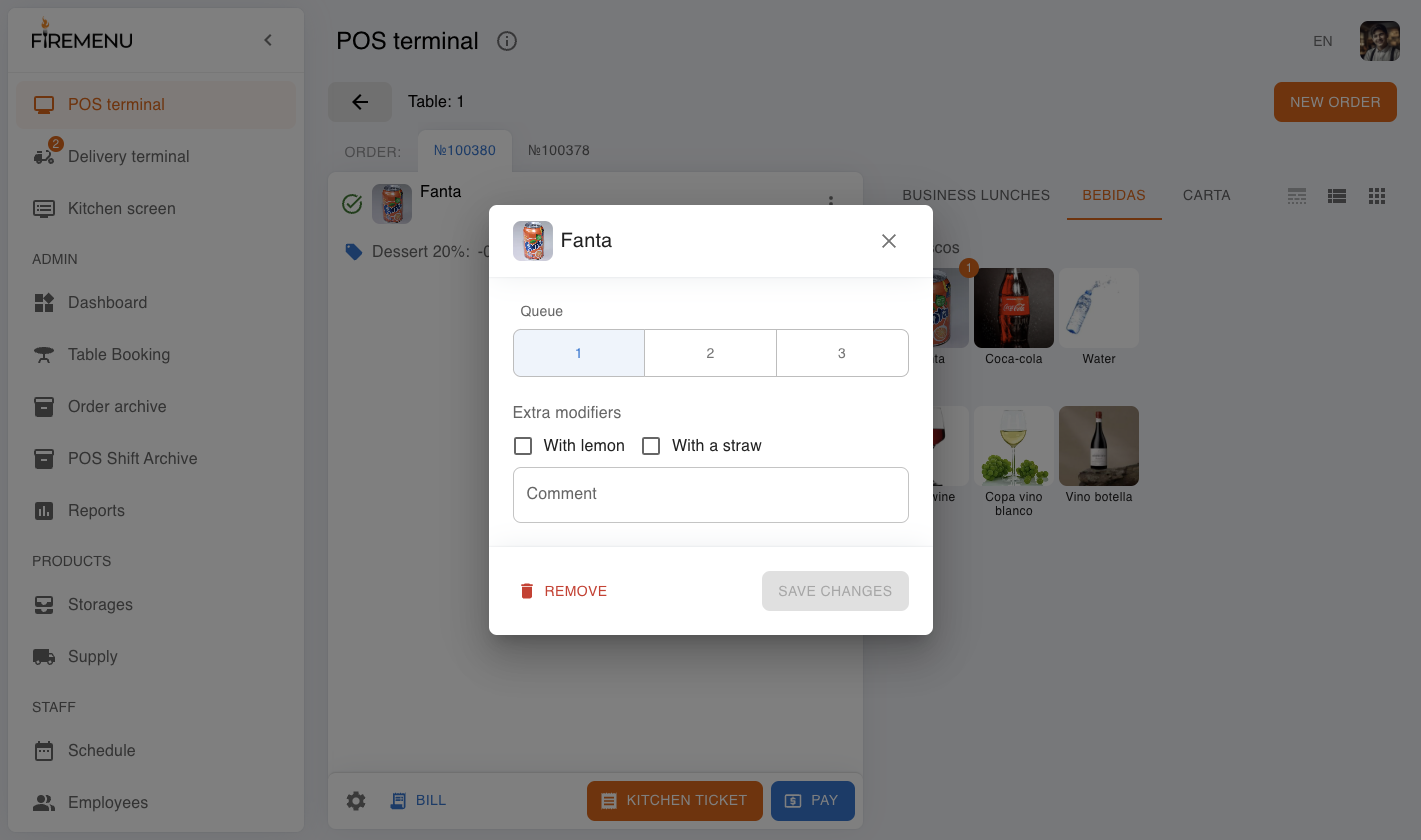
How to edit order items (before payment)
- Click the item menu (⋮) in the order list to open editing.
- In the edit window, you can:
- change a variation;
- select modifiers;
- add an item comment;
- delete an item (if allowed by permissions).
Additional order actions (settings menu)
The settings menu (⚙ icon) is available in the bottom order panel. Depending on permissions and order state, it can include:
- “Split order” (when there are 2+ items and the order is not paid yet).
- “Change waiter or table” (reassign responsible worker/table).
- “Add comment” (order-level comment).
- “Delete” (allowed only when the order has no items and permissions allow it).
After payment, some actions (edit/split/change, etc.) become unavailable. This is expected behavior.
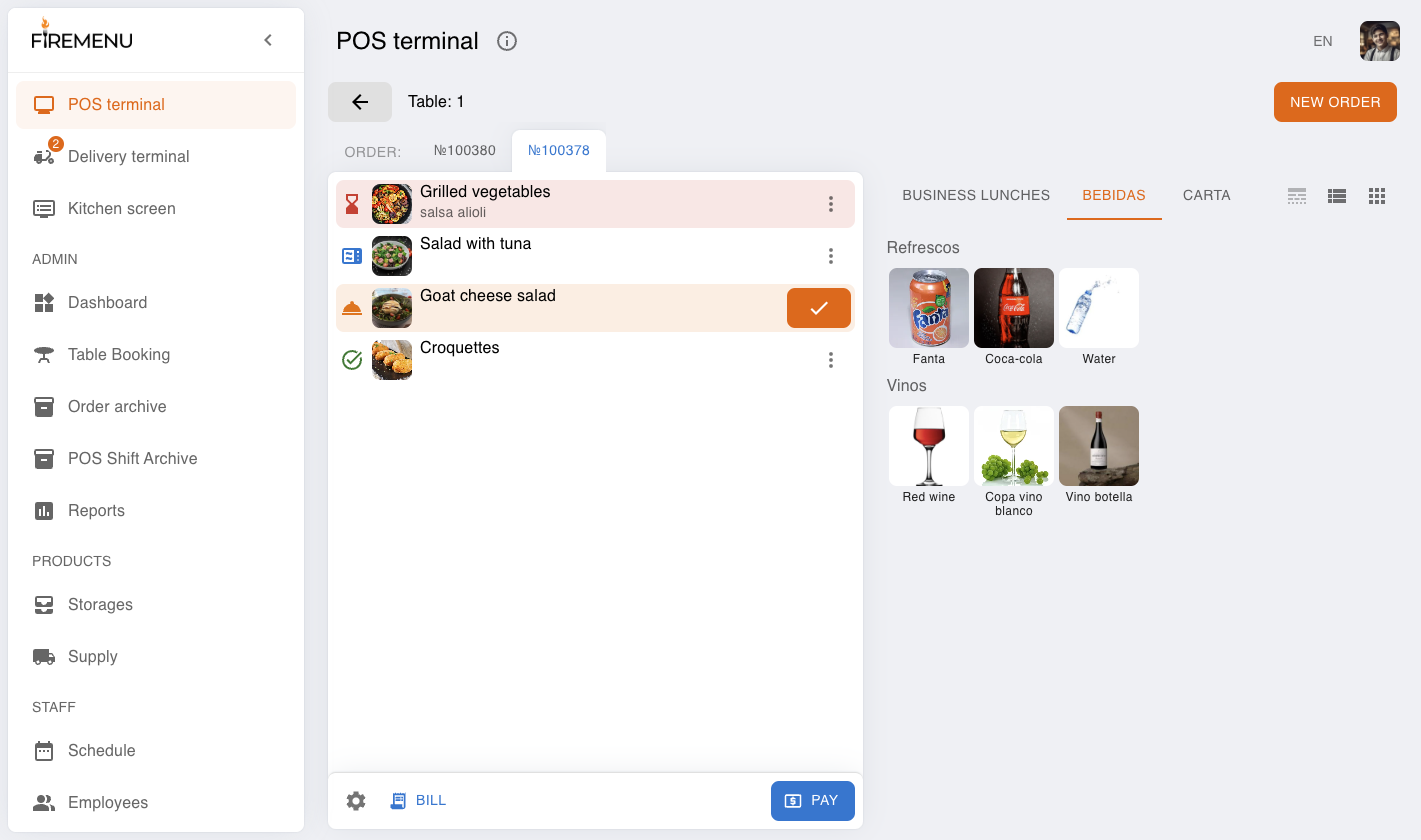
Table and item statuses
Item statuses
FireMenu uses these item states:
- “Waiting” - hourglass icon. Usually gray; if waiting longer than ~3 min, it becomes red.
- “Cooking” - microwave icon, blue color.
- “Ready to serve” - serving tray icon, orange color.
- “Served” - checkmark icon, green color.
Example of one order with mixed item statuses:
Status behavior depends on the kitchen place mode:
- Full mode - classic chain: “Waiting” -> “Cooking” -> “Ready to serve” -> “Served”.
- Short mode - item jumps from “Waiting” directly to “Served” (without separate cooking/ready steps).
- Statuses disabled - item is added immediately as “Served” (manual kitchen status workflow is not used).
Table statuses on the floor map
Table color is calculated by state priority (critical to normal):
- Red: unconfirmed order exists, or at least one item waits too long.
- Orange: there are items in “Ready to serve”.
- Blue: active items are in “Waiting” or “Cooking”.
- Green: all active items are “Served”.
- Dark gray: no orders, but active reservation exists.
- Gray: table is free (no reservation and no active orders).
Practical hints for a shift:
- if a table is orange - check ready items and serve them;
- if a table is red - check delays or order confirmation;
- if a table is dark gray - prepare it for reservation.
Common issues and fixes
-
Issue: “New order” button is disabled.
Fix: Check employee permissions (requires create/edit own orders) and verify there are no POS shift restrictions. -
Issue: You see “The work shift is not open yet”.
Fix: Open a POS shift (or allow work without shift if your venue policy allows it). -
Issue: In offline mode on mobile, item add/edit actions do not work.
Fix: Check internet connection and wait for sync. Retry after network is restored. -
Issue: “Pay” is disabled in cash flow.
Fix: Enter cash amount not lower than “To pay”, or pay part in cash and use “Pay the rest by card”. -
Issue: “Kitchen ticket” is disabled or not shown.
Fix: Verify items have a kitchen place with kitchen-print enabled and that these items were not printed before. -
Issue: You click “Print”, but nothing prints.
Fix: Check POS printer connection/settings (printer/port/permissions) and confirm the correct target device.