QR menu features
QR menu is the web version of your menu via a link and scannable QR code. Guests browse dishes, can leave reviews, and—when enabled—book a table or place table orders with online payment without installing an app.
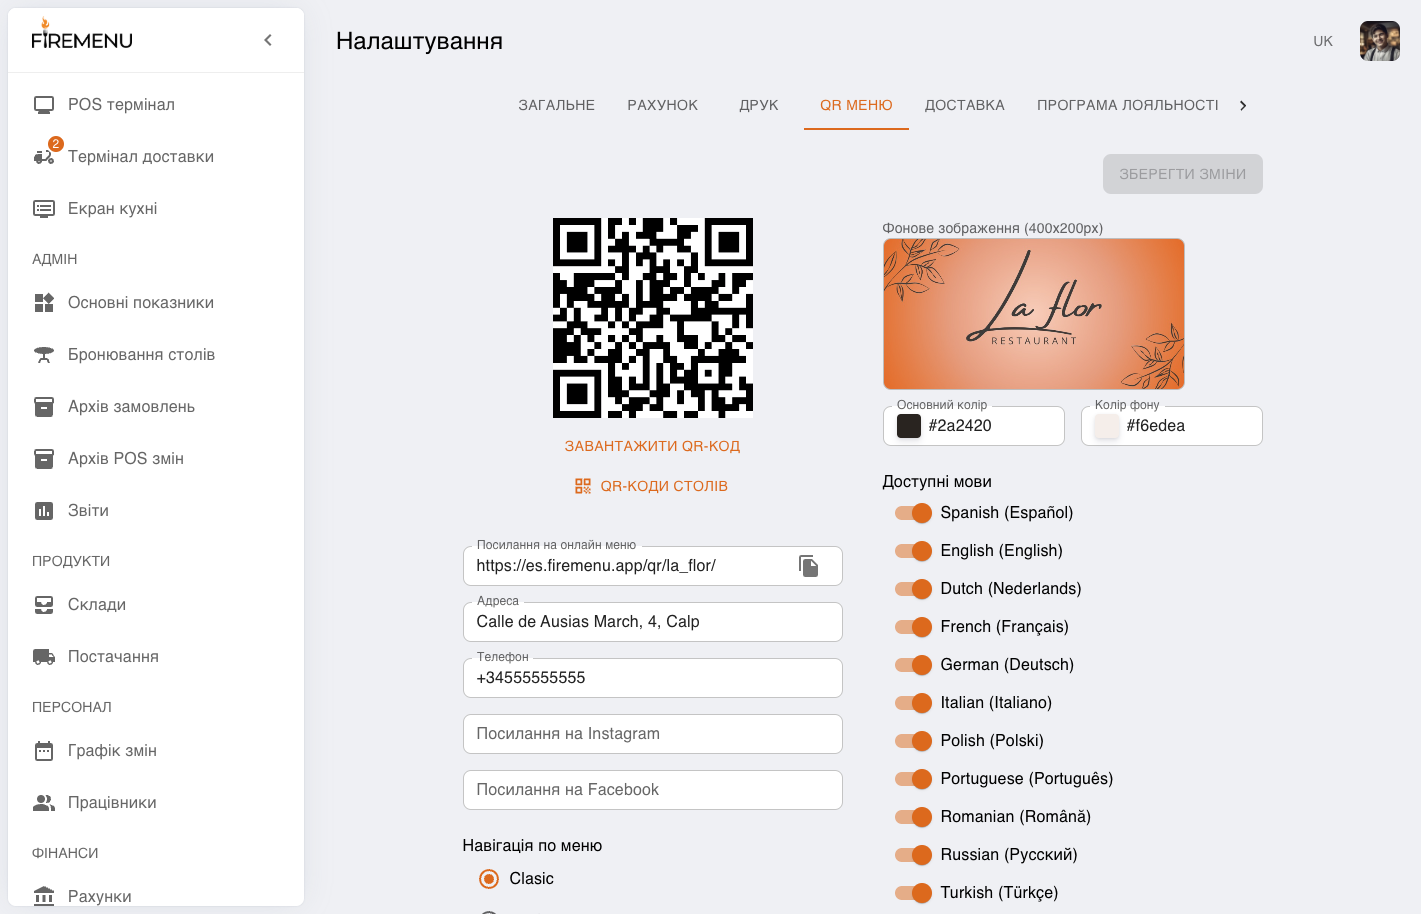
Settings live on the «QR Menu» tab under «Settings» and require restaurant settings access.
Contents:
- How to open the «QR Menu» tab
- Link, QR code, and download
- Address, phone, and social links
- Menu navigation
- Available features
- Look and feel: banner and colours
- Available languages
- Table QR codes
- Typical scenarios and fixes
- Related articles
How to open the «QR Menu» tab
Open «Settings» in the sidebar.
Select the «QR Menu» tab (the tab row under the page title; scroll horizontally if needed).
After edits press «Save changes» at the top (enabled only when there are unsaved changes).
Link, QR code, and download
- «Online Menu Link» shows the permanent URL for your web menu—copy it with the copy icon.
- A large QR code above the field encodes the same link for print or display.
- «Download QR Code» saves a PNG for print or social posts.
Address, phone, and social links
«Address», «Phone», «Instagram Link», and «Facebook Link» feed the branded block guests see in QR menu. Address may pre-fill from the venue map pin—adjust the text manually if needed.
Menu navigation
«Menu navigation» controls how a guest moves inside a section after choosing it on the QR home page.
-
Clasic — two-step browsing: category cards first (image and name). Tapping a category opens items for that category only. A top bar keeps Back and breadcrumbs section → category.
-
Modern — all categories in the section appear as a horizontal strip of names (scrollable). Tapping a name swaps the items shown below (and category description when set). There is no separate full-screen grid of large category cards—navigation stays flatter for faster browsing.
Pick Clasic for large category cards and an explicit extra step; Modern when you want to swipe categories quickly in one row.
Available features
Under «Available features»:
«Visitor Reviews» — guests can submit feedback when the capability is enabled for your venue.
«Online table booking» — guests can submit an online reservation request.
«Ordering and Payment through QR Menu» — table ordering via QR with payment in the online menu.
Look and feel: banner and colours
«Background image» — banner in the QR menu header (recommended size noted in UI, for example 400×200 px); upload or choose from the image catalogue.
«Primary color» and «Background color» — accent and page background colours for guests.
Available languages
«Available languages» lists a toggle per language—enable only languages you actually translate in the menu so guests do not switch to empty content.
Spanish and English are often enabled by default; add others manually when translations exist.
Table QR codes
When «Ordering and Payment through QR Menu» is on, «Table QR codes» appears under the main QR code. It opens codes per table—same menu but tied to the table so orders land on the correct table record.
Tables come from your venue table map; without tables the list is empty. See also Halls and table map.
Typical scenarios and fixes
-
Changes do not persist. Confirm «Save changes» was pressed and the button was not greyed out (no pending edits).
-
Guest cannot select a language. Enable it under «Available languages» and translate dish names in Main menu.