Halls and table map
The table map helps servers see occupancy at a glance and open orders for a specific table. In FireMenu you first create halls with tables on the plan, then POS can show the interactive floor (when enabled in settings).
Contents:
- How to enable the map in POS
- How to add a hall and manage the hall list
- How to arrange tables on a hall map
- Multiple halls in POS
- Related articles
In the sidebar open «Table map»: you see the hall list with table counts and «Add hall».

How to enable the map in POS
In «Settings», on the «General» tab, enable «Use table map» (see General settings).
Ensure at least one hall has at least one table—otherwise POS falls back to the standard order list without a map.
How to add a hall and manage the hall list
On «Table map» click «Add hall»—this opens the full-screen editor for a new hall.
In the hall table the «Tables» column shows how many tables are in each hall; use «Search» to filter halls by name.
In the row «Actions» menu you can:
- «Rename hall»—change «Hall name».
- «Edit table map»—reopen placement and background editing.
- «Remove»—delete the hall; confirmation warns that all tables in that hall will be removed from the map.
How to arrange tables on a hall map
The top bar shows the hall name, «Save changes», and close; below are «Add table», «Upload background» / «Remove background» (when a background exists), and the map canvas with zoom controls.
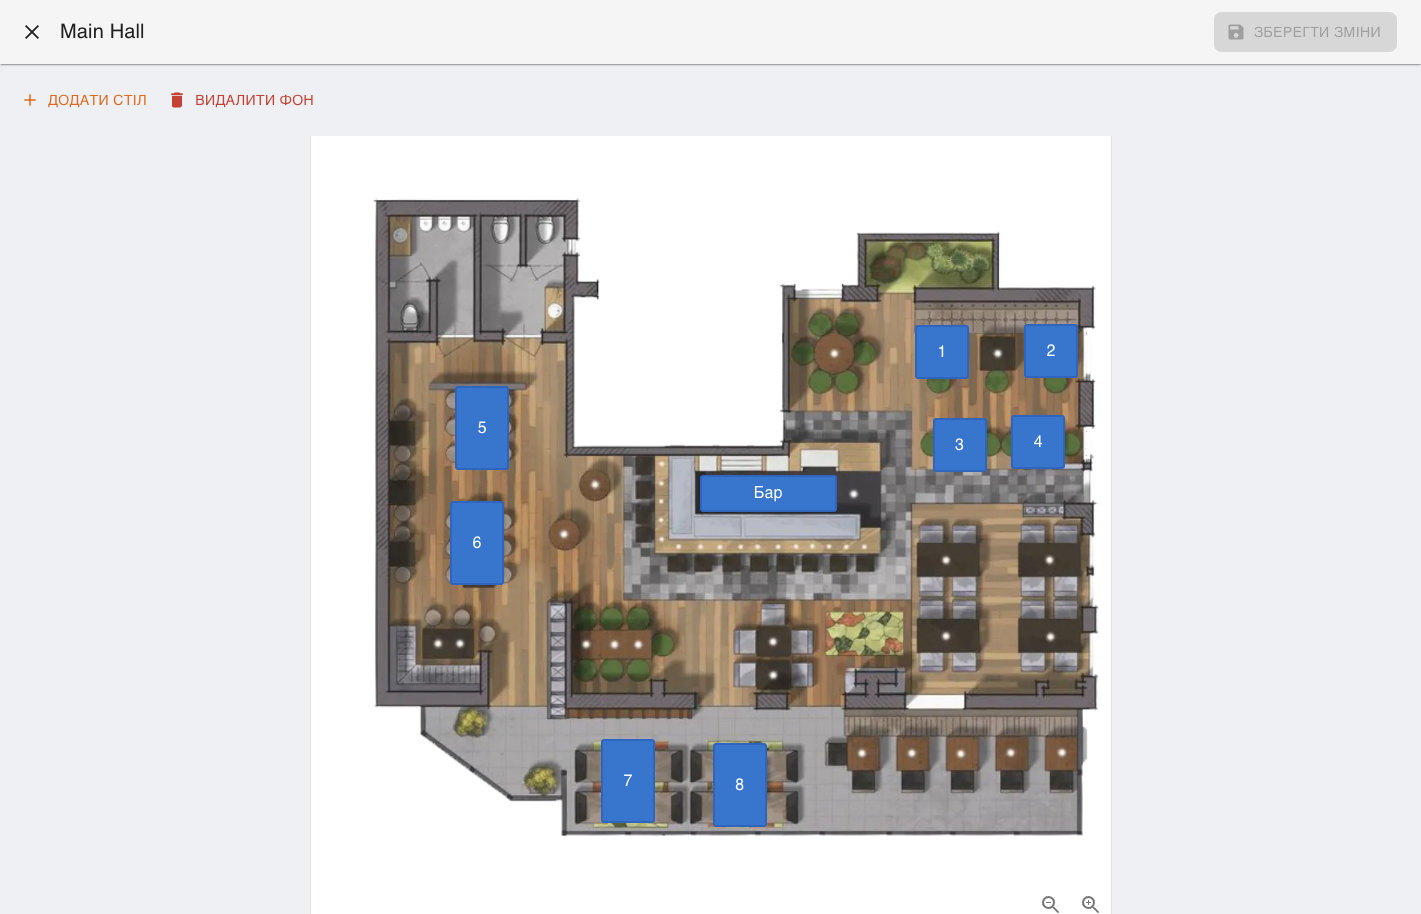
In the hall editor click «Add table» and pick a shape—for example «Square», «Round», rectangular, or bar-style—matching real tables.
Optionally upload a floor plan with «Upload background» to align tables visually.
Drag tables on the canvas; use corner zoom buttons to scale the view for large or small rooms.
Each table has edit/remove icons—in edit mode you can rename the table and copy its QR code.
When finished press «Save changes» in the top bar. Closing with unsaved edits shows a confirmation.
Multiple halls in POS
POS always shows one hall at a time—its background and tables. With multiple halls, thumbnails with hall names appear next to the canvas: tap one to switch the active hall and refresh the center map. With a single hall only that map is shown—no thumbnails.