Sunmi printer troubleshooting
If your Sunmi printer was set up using the main guide but receipts or kitchen tickets still do not print, work through the steps below in order. Most issues come down to network connectivity, Chrome permission for the printer IP, or the printer IP in FireMenu print settings.
For the full first-time setup, see Printer connection.
Step 1: Check the basics
- Power the printer off and on again.
- Check the router: cable in an active port, venue internet healthy if the printer uses DHCP.
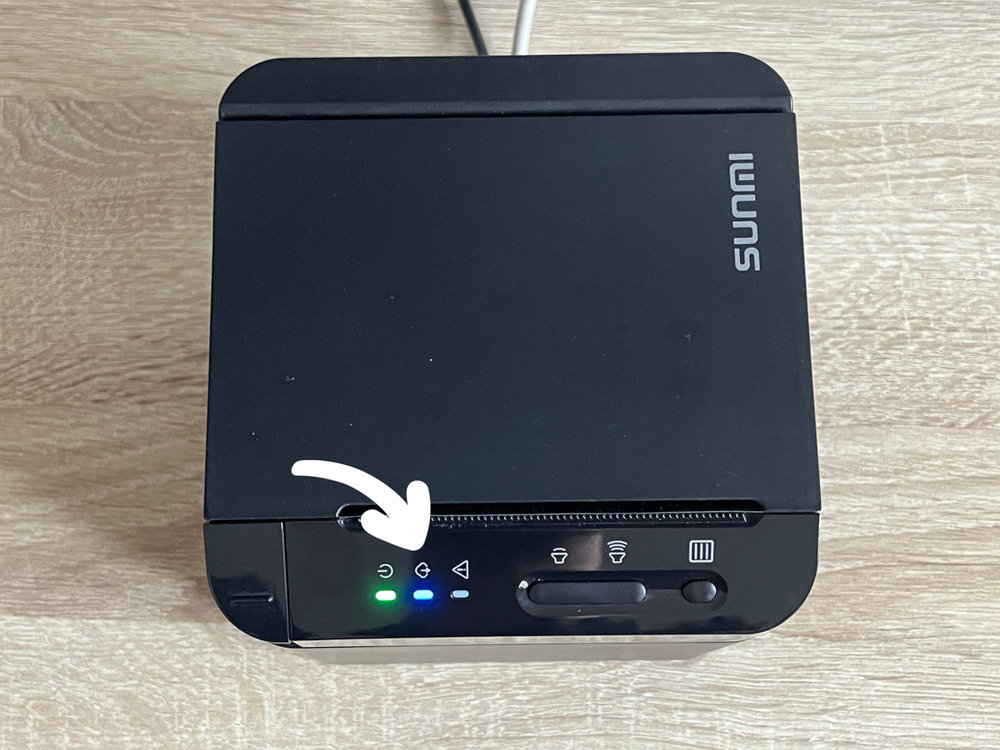
- Check the printer:
- the blue network indicator should be on;
- double-press the button on the back and confirm on the status slip that the printer has an IP address;
- if there is no IP on the slip, repeat network setup from Printer connection (Ethernet and status slip steps).
Step 2: Check Chrome
If the printer is definitely on the network and you know the IP:
- Open Chrome on the POS device.
- Confirm the printer IP is listed under “Insecure origins treated as secure” (
chrome://flags): each entry must usehttp://plus the IP (for examplehttp://192.168.1.100). Separate multiple entries with commas. - Set the flag to Enabled, click Relaunch, then fully quit Chrome after it restarts.
More detail in Printer connection, step 3.

Step 3: Check FireMenu
- Open FireMenu on the device where you expect printing to happen.
- Click the avatar / profile menu in the top-right corner and open Print settings.
- Check the device role:
- on the POS with printers, use Main POS with printers or This device prints by itself;
- on a phone or tablet without printers, use Additional device without printers.
- If this is the POS with the printer, open the printer in the list and verify:
- Type — Network printer;
- IP address — matches the current status slip.
- Click Done and run a test print from the POS (or wherever you expect the ticket).
Step 4: Optional static IP
If the status slip IP keeps changing (DHCP assigns a new address), assigning a static IP on the printer avoids updating Chrome and FireMenu after every change.
- Print a status slip (double-press the rear button).
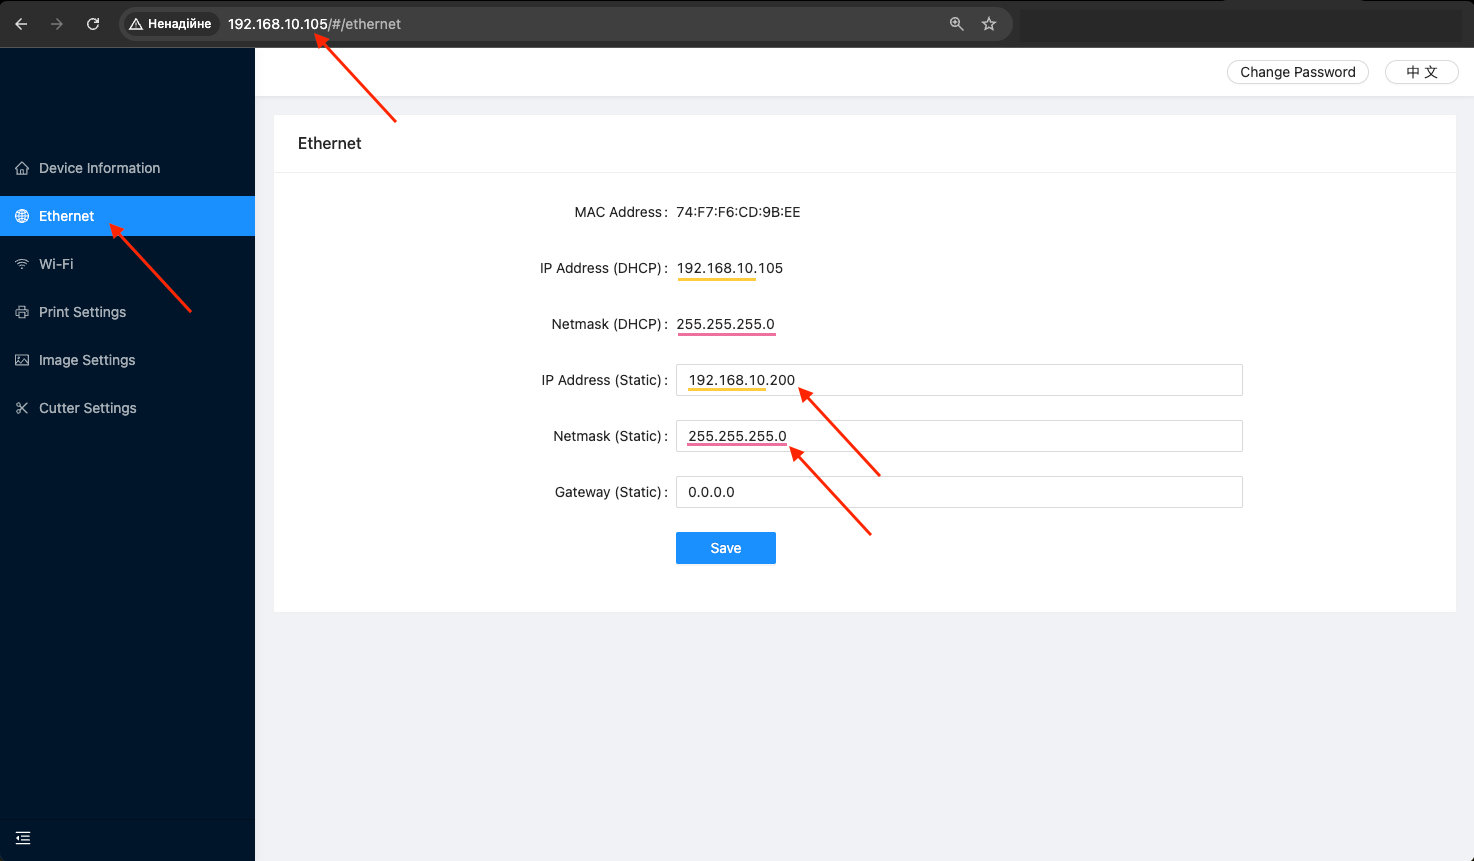
- In a browser on your device, enter the printer’s current IP in the address bar.
- Open the printer’s web configuration:
- click Log in (default password is often empty—leave the password field blank).
- Open the Ethernet section.
- In “IP Address (Static)”, use the same subnet as “IP Address (DHCP)” but set the last octet to a value between 150 and 250 (for example if DHCP gave
192.168.1.100, you might use192.168.1.200). Save. - In “Netmask (Static)”, enter the same value as “Netmask (DHCP)”.
- Click Save, then power-cycle the printer.
- Print a new status slip and update Chrome and FireMenu → Print settings with the new static IP, following the same rules as in Printer connection.
Still not working?
If printing still fails after these steps, contact FireMenu support with the printer model, the IP from the latest status slip, and a short note (what does not print: POS, kitchen, cash drawer, and so on).
Related articles
- Printer connection—full first-time setup: Ethernet or USB, FireMenu print settings.
- Cash drawer—if only the open-drawer pulse fails.
- Kitchen screen setup—if only kitchen tickets fail.